Pinecone - Vercel AI SDK Starter
A Next.js starter chatbot using Vercel's AI SDK and implements the Retrieval-Augmented Generation (RAG) pattern with Pinecone
In this example, we'll build a full-stack application that uses Retrieval Augmented Generation (RAG) powered by Pinecone to deliver accurate and contextually relevant responses in a chatbot.
RAG is a powerful tool that combines the benefits of retrieval-based models and generative models. Unlike traditional chatbots that can struggle with maintaining up-to-date information or accessing domain-specific knowledge, a RAG-based chatbot uses a knowledge base created from crawled URLs to provide contextually relevant responses.
Incorporating Vercel's AI SDK into our application will allow us easily set up the chatbot workflow and utilize streaming more efficiently, particularly in edge environments, enhancing the responsiveness and performance of our chatbot.
By the end of this tutorial, you'll have a context-aware chatbot that provides accurate responses without hallucination, ensuring a more effective and engaging user experience. Let's get started on building this powerful tool (Full code listing).
Step 1: Setting Up Your Next.js Application
Next.js is a powerful JavaScript framework that enables us to build server-side rendered and static web applications using React. It's a great choice for our project due to its ease of setup, excellent performance, and built-in features such as routing and API routes.
To create a new Next.js app, run the following command:
npx
npx create-next-app chatbot
Next, we'll add the ai package:
npm install ai
You can use the full list of dependencies if you'd like to build along with the tutorial.
Step 2: Create the Chatbot
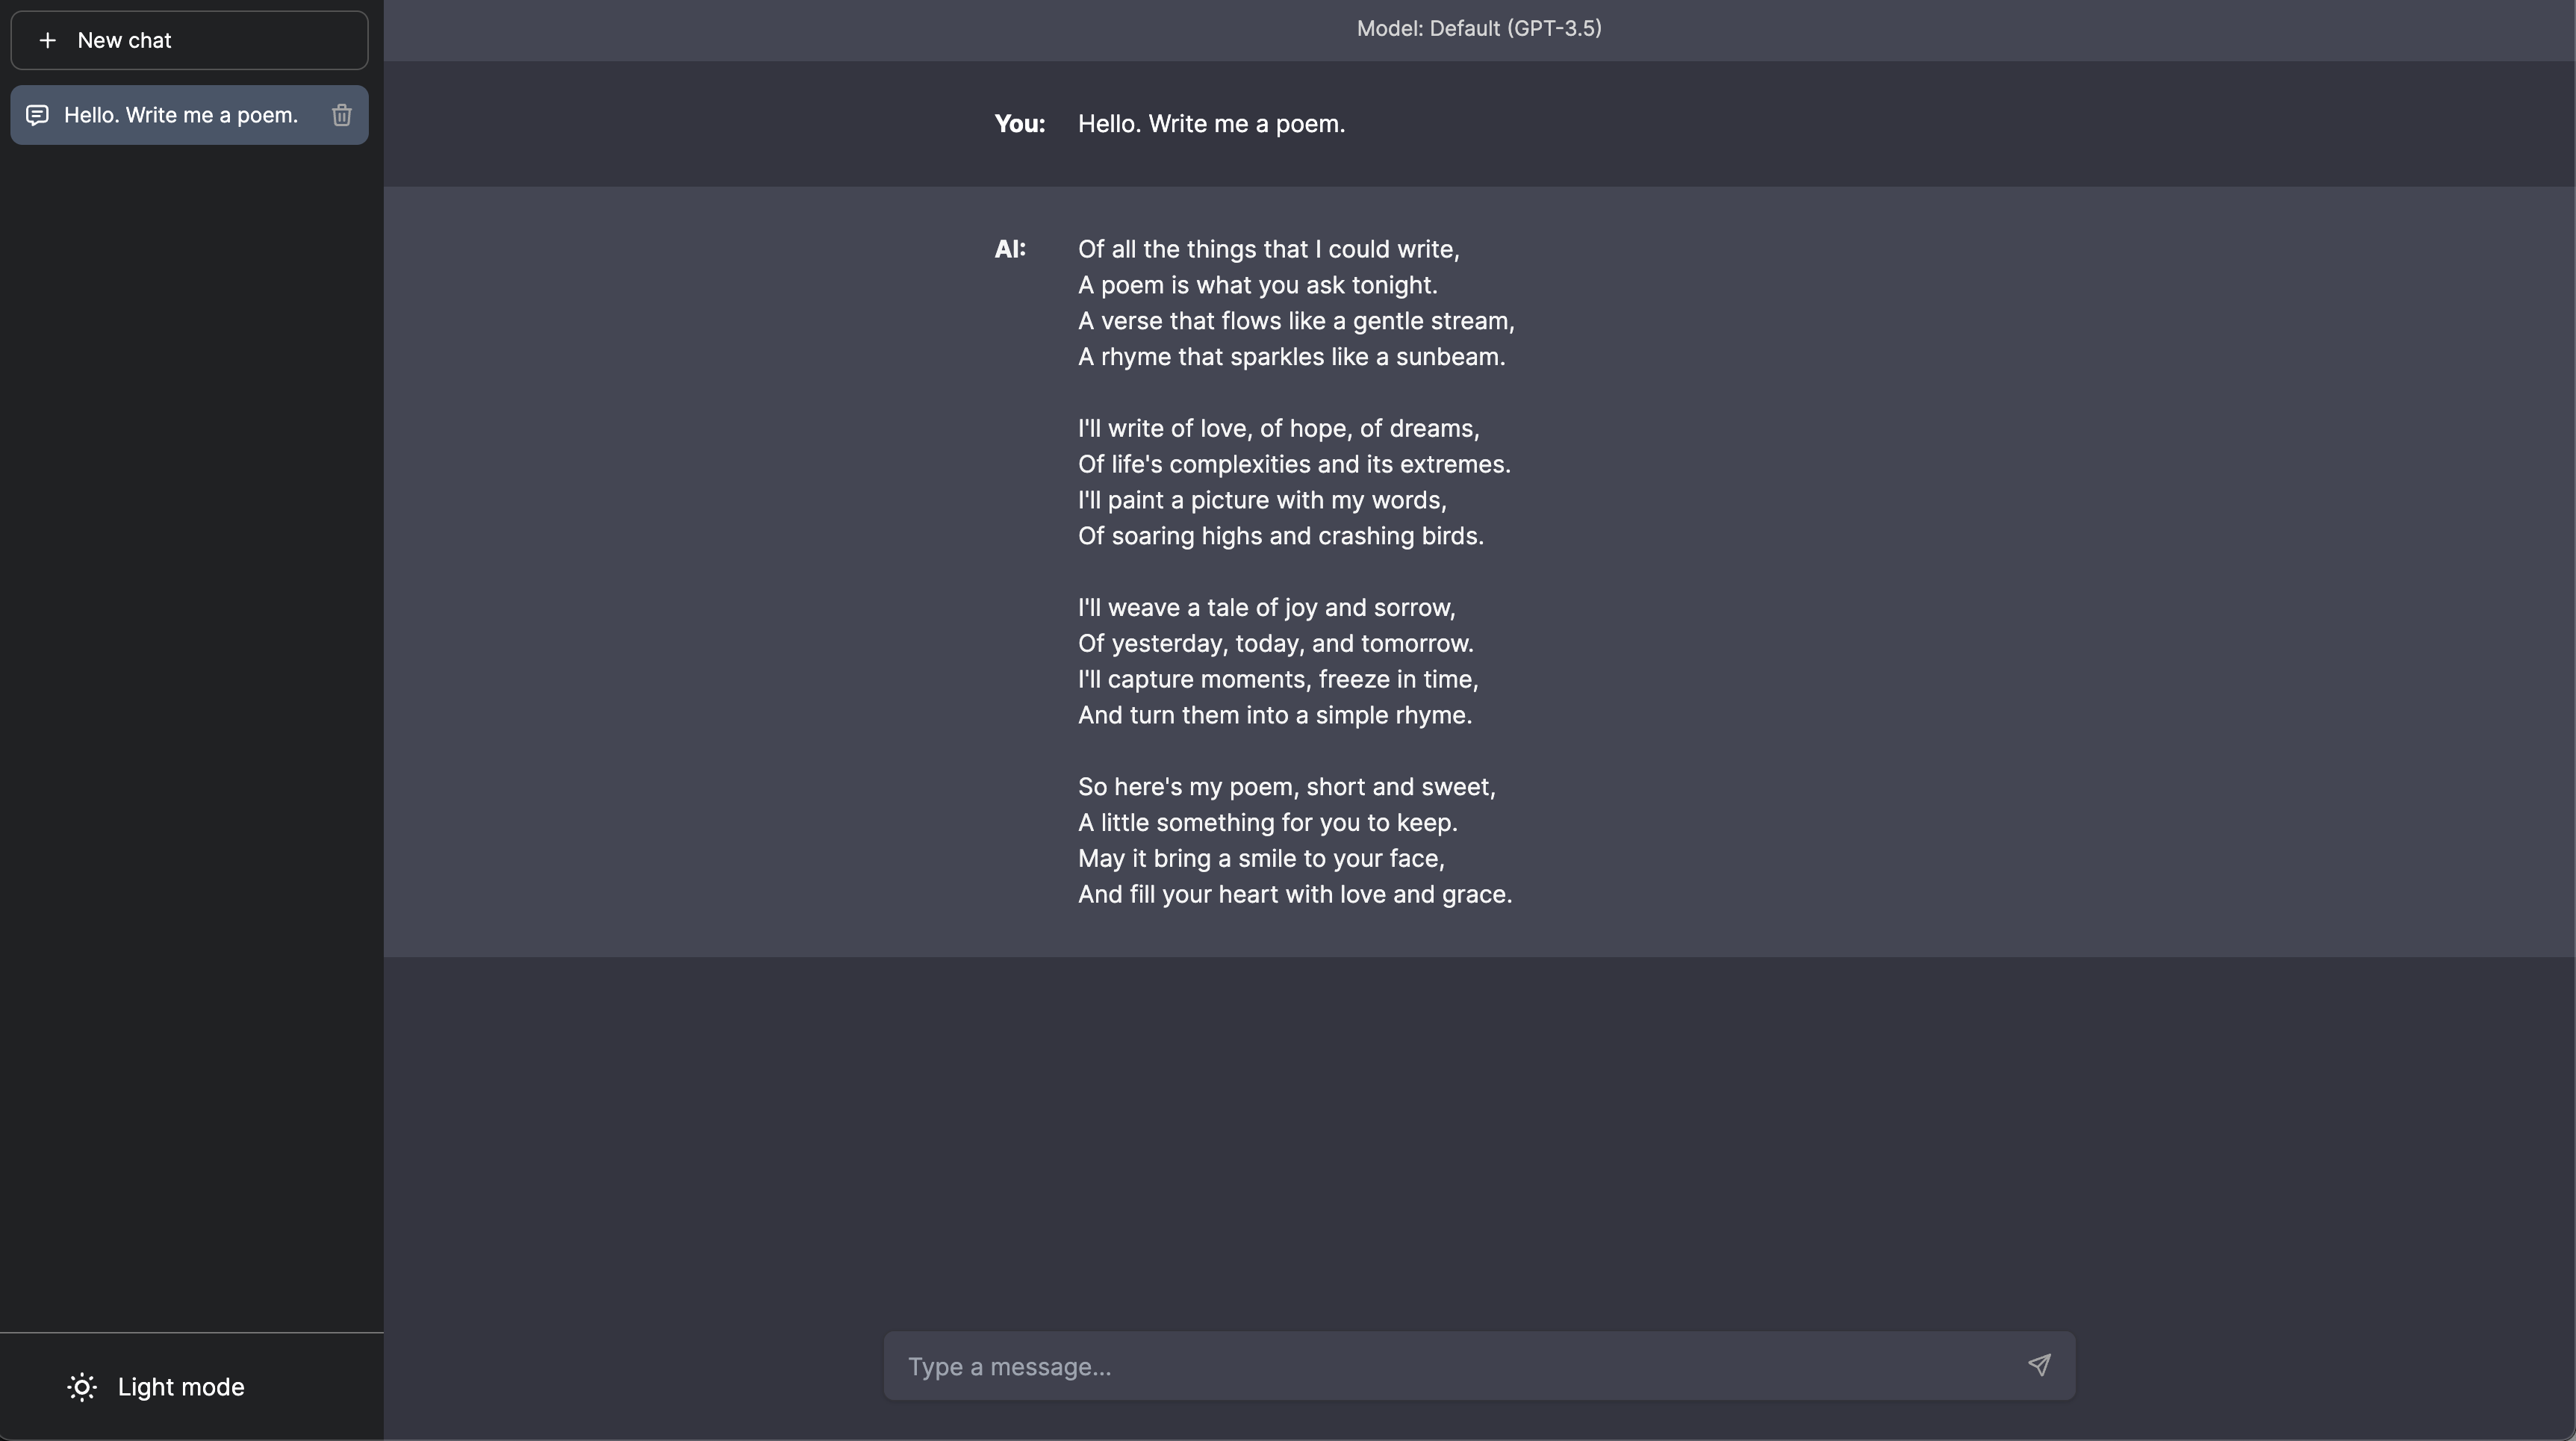
In this step, we're going to use the Vercel SDK to establish the backend and frontend of our chatbot within the Next.js application. By the end of this step, our basic chatbot will be up and running, ready for us to add context-aware capabilities in the following stages. Let's get started.
Chatbot frontend component
Now, let's focus on the frontend component of our chatbot. We're going to build the user-facing elements of our bot, creating the interface through which users will interact with our application. This will involve crafting the design and functionality of the chat interface within our Next.js application.
First, we'll create the Chat component, that will render the chat interface.
import React, { FormEvent, ChangeEvent } from "react";
import Messages from "./Messages";
import { Message } from "ai/react";

interface Chat {
  input: string;
  handleInputChange: (e: ChangeEvent<HTMLInputElement>) => void;
  handleMessageSubmit: (e: FormEvent<HTMLFormElement>) => Promise<void>;
  messages: Message[];
}

const Chat: React.FC<Chat> = ({
  input,
  handleInputChange,
  handleMessageSubmit,
  messages,
}) => {
  return (
    <div id="chat" className="...">
      <Messages messages={messages} />
      <>
        <form onSubmit={handleMessageSubmit} className="...">
          <input
            type="text"
            className="..."
            value={input}
            onChange={handleInputChange}
          />

          <span className="...">Press ⮐ to send</span>
        </form>
      </>
    </div>
  );
};

export default Chat;
This component will display the list of messages and the input form for the user to send messages. The Messages component to render the chat messages:
import { Message } from "ai"; import { useRef } from "react"; export default function Messages({ messages }: { messages: Message[] }) { const messagesEndRef = useRef<HTMLDivElement | null>(null); return ( <div className="..."> {messages.map((msg, index) => ( <div key={index} className={`${ msg.role === "assistant" ? "text-green-300" : "text-blue-300" } ... `} > <div className="...">{msg.role === "assistant" ? "🤖" : "🧑💻"}</div> <div className="...">{msg.content}</div> </div> ))} <div ref={messagesEndRef} /> </div> ); }
Our main Page component will manage the state for the messages displayed in the Chat component:
"use client";
import Header from "@/components/Header";
import Chat from "@/components/Chat";
import { useChat } from "ai/react";

const Page: React.FC = () => {
  const [context, setContext] = useState<string[] | null>(null);
  const { messages, input, handleInputChange, handleSubmit } = useChat();

  return (
    <div className="...">
      <Header className="..." />
      <div className="...">
        <Chat
          input={input}
          handleInputChange={handleInputChange}
          handleMessageSubmit={handleSubmit}
          messages={messages}
        />
      </div>
    </div>
  );
};

export default Page;
The useful useChat hook will manage the state for the messages displayed in the Chat component. It will:
- Send the user's message to the backend
- Update the state with the response from the backend
- Handle any internal state changes (e.g. when the user types a message)
Chatbot API endpoint
Next, we'll set up the Chatbot API endpoint. This is the server-side component that will handle requests and responses for our chatbot. We'll create a new file called api/chat/route.ts and add the following dependencies:
import { Configuration, OpenAIApi } from "openai-edge";
import { Message, OpenAIStream, StreamingTextResponse } from "ai";
The first dependency is the openai-edge package which makes it easier to interact with OpenAI's APIs in an edge environment. The second dependency is the ai package which we'll use to define the Message and OpenAIStream types, which we'll use to stream back the response from OpenAI back to the client.
Next initialize the OpenAI client:
// Create an OpenAI API client (that's edge friendly!)
const config = new Configuration({
  apiKey: process.env.OPENAI_API_KEY,
});
const openai = new OpenAIApi(config);
To define this endpoint as an edge function, we'll define and export the runtime variable
export const runtime = "edge";
Next, we'll define the endpoint handler:
export async function POST(req: Request) {
  try {
    const { messages } = await req.json();

    const prompt = [
      {
        role: "system",
        content: `AI assistant is a brand new, powerful, human-like artificial intelligence.
      The traits of AI include expert knowledge, helpfulness, cleverness, and articulateness.
      AI is a well-behaved and well-mannered individual.
      AI is always friendly, kind, and inspiring, and he is eager to provide vivid and thoughtful responses to the user.
      AI has the sum of all knowledge in their brain, and is able to accurately answer nearly any question about any topic in conversation.
      AI assistant is a big fan of Pinecone and Vercel.
      `,
      },
    ];

    // Ask OpenAI for a streaming chat completion given the prompt
    const response = await openai.createChatCompletion({
      model: "gpt-3.5-turbo",
      stream: true,
      messages: [
        ...prompt,
        ...messages.filter((message: Message) => message.role === "user"),
      ],
    });
    // Convert the response into a friendly text-stream
    const stream = OpenAIStream(response);
    // Respond with the stream
    return new StreamingTextResponse(stream);
  } catch (e) {
    throw e;
  }
}
Here we deconstruct the messages from the post, and create our initial prompt. We use the prompt and the messages as the input to the createChatCompletion method. We then convert the response into a stream and return it to the client. Note that in this example, we only send the user's messages to OpenAI (as opposed to including the bot's messages as well).
Step 3. Adding Context
As we dive into building our chatbot, it's important to understand the role of context. Adding context to our chatbot's responses is key for creating a more natural, conversational user experience. Without context, a chatbot's responses can feel disjointed or irrelevant. By understanding the context of a user's query, our chatbot will be able to provide more accurate, relevant, and engaging responses. Now, let's begin building with this goal in mind.
First, we'll first focus on seeding the knowledge base. We'll create a crawler and a seed script, and set up a crawl endpoint. This will allow us to gather and organize the information our chatbot will use to provide contextually relevant responses.
After we've populated our knowledge base, we'll retrieve matches from our embeddings. This will enable our chatbot to find relevant information based on user queries.
Next, we'll wrap our logic into the getContext function and update our chatbot's prompt. This will streamline our code and improve the user experience by ensuring the chatbot's prompts are relevant and engaging.
Finally, we'll add a context panel and an associated context endpoint. These will provide a user interface for the chatbot and a way for it to retrieve the necessary context for each user query.
This step is all about feeding our chatbot the information it needs and setting up the necessary infrastructure for it to retrieve and use that information effectively. Let's get started.
Seeding the Knowledge Base
Now we'll move on to seeding the knowledge base, the foundational data source that will inform our chatbot's responses. This step involves collecting and organizing the information our chatbot needs to operate effectively. In this guide, we're going to use data retrieved from various websites which we'll later on be able to ask questions about. To do this, we'll create a crawler that will scrape the data from the websites, embed it, and store it in Pinecone.
Create the crawler
For the sake of brevity, you'll be able to find the full code for the crawler here. Here are the pertinent parts:
class Crawler {
  private seen = new Set<string>();
  private pages: Page[] = [];
  private queue: { url: string; depth: number }[] = [];

  constructor(private maxDepth = 2, private maxPages = 1) {}

  async crawl(startUrl: string): Promise<Page[]> {
    // Add the start URL to the queue
    this.addToQueue(startUrl);

    // While there are URLs in the queue and we haven't reached the maximum number of pages...
    while (this.shouldContinueCrawling()) {
      // Dequeue the next URL and depth
      const { url, depth } = this.queue.shift()!;

      // If the depth is too great or we've already seen this URL, skip it
      if (this.isTooDeep(depth) || this.isAlreadySeen(url)) continue;

      // Add the URL to the set of seen URLs
      this.seen.add(url);

      // Fetch the page HTML
      const html = await this.fetchPage(url);

      // Parse the HTML and add the page to the list of crawled pages
      this.pages.push({ url, content: this.parseHtml(html) });

      // Extract new URLs from the page HTML and add them to the queue
      this.addNewUrlsToQueue(this.extractUrls(html, url), depth);
    }

    // Return the list of crawled pages
    return this.pages;
  }

  // ... Some private methods removed for brevity

  private async fetchPage(url: string): Promise<string> {
    try {
      const response = await fetch(url);
      return await response.text();
    } catch (error) {
      console.error(`Failed to fetch ${url}: ${error}`);
      return "";
    }
  }

  private parseHtml(html: string): string {
    const $ = cheerio.load(html);
    $("a").removeAttr("href");
    return NodeHtmlMarkdown.translate($.html());
  }

  private extractUrls(html: string, baseUrl: string): string[] {
    const $ = cheerio.load(html);
    const relativeUrls = $("a")
      .map((_, link) => $(link).attr("href"))
      .get() as string[];
    return relativeUrls.map(
      (relativeUrl) => new URL(relativeUrl, baseUrl).href
    );
  }
}
The Crawler class is a web crawler that visits URLs, starting from a given point, and collects information from them. It operates within a certain depth and a maximum number of pages as defined in the constructor. The crawl method is the core function that starts the crawling process.
The helper methods fetchPage, parseHtml, and extractUrls respectively handle fetching the HTML content of a page, parsing the HTML to extract text, and extracting all URLs from a page to be queued for the next crawl. The class also maintains a record of visited URLs to avoid duplication.
Create the seed function
To tie things together, we'll create a seed function that will use the crawler to seed the knowledge base. In this portion of the code, we'll initialize the crawl and fetch a given URL, then split it's content into chunks, and finally embed and index the chunks in Pinecone.
async function seed(url: string, limit: number, indexName: string, options: SeedOptions) {
  try {
    // Initialize the Pinecone client
    const pinecone = new Pinecone();

    // Destructure the options object
    const { splittingMethod, chunkSize, chunkOverlap } = options;

    // Create a new Crawler with depth 1 and maximum pages as limit
    const crawler = new Crawler(1, limit || 100);

    // Crawl the given URL and get the pages
    const pages = await crawler.crawl(url) as Page[];

    // Choose the appropriate document splitter based on the splitting method
    const splitter: DocumentSplitter = splittingMethod === 'recursive' ?
      new RecursiveCharacterTextSplitter({ chunkSize, chunkOverlap }) : new MarkdownTextSplitter({});

    // Prepare documents by splitting the pages
    const documents = await Promise.all(pages.map(page => prepareDocument(page, splitter)));

    // Create Pinecone index if it does not exist
    const indexList = await pinecone.listIndexes();
    const indexExists = indexList.some(index => index.name === indexName)
    if (!indexExists) {
      await pinecone.createIndex({
        name: indexName,
        dimension: 1536,
        waitUntilReady: true,
      });
    }

    const index = pinecone.Index(indexName)

    // Get the vector embeddings for the documents
    const vectors = await Promise.all(documents.flat().map(embedDocument));

    // Upsert vectors into the Pinecone index
    await chunkedUpsert(index!, vectors, '', 10);

    // Return the first document
    return documents[0];
  } catch (error) {
    console.error("Error seeding:", error);
    throw error;
  }
}
To chunk the content we'll use one of the following methods:
RecursiveCharacterTextSplitter- This splitter splits the text into chunks of a given size, and then recursively splits the chunks into smaller chunks until the chunk size is reached. This method is useful for long documents.MarkdownTextSplitter- This splitter splits the text into chunks based on Markdown headers. This method is useful for documents that are already structured using Markdown. The benefit of this method is that it will split the document into chunks based on the headers, which will be useful for our chatbot to understand the structure of the document. We can assume that each unit of text under a header is an internally coherent unit of information, and when the user asks a question, the retrieved context will be internally coherent as well.
Add the crawl endpoint`
The endpoint for the crawl endpoint is pretty straightforward. It simply calls the seed function and returns the result.
import seed from "./seed";
import { NextResponse } from "next/server";

export const runtime = "edge";

export async function POST(req: Request) {
  const { url, options } = await req.json();
  try {
    const documents = await seed(url, 1, process.env.PINECONE_INDEX!, options);
    return NextResponse.json({ success: true, documents });
  } catch (error) {
    return NextResponse.json({ success: false, error: "Failed crawling" });
  }
}
Now our backend is able to crawl a given URL, embed the content and index the embeddings in Pinecone. The endpoint will return all the segments in the retrieved webpage we crawl, so we'll be able to display them. Next, we'll write a set of functions that will build the context out of these embeddings.
Get matches from embeddings
To retrieve the most relevant documents from the index, we'll use the query function in the Pinecone SDK. This function takes a vector and returns the most similar vectors from the index. We'll use this function to retrieve the most relevant documents from the index, given some embeddings.
const getMatchesFromEmbeddings = async (embeddings: number[], topK: number, namespace: string): Promise<ScoredPineconeRecord<Metadata>[]> => {
  // Obtain a client for Pinecone
  const pinecone = new Pinecone();

  const indexName: string = process.env.PINECONE_INDEX || '';
  if (indexName === '') {
    throw new Error('PINECONE_INDEX environment variable not set')
  }

  // Retrieve the list of indexes to check if expected index exists
  const indexes = await pinecone.listIndexes()
  if (indexes.filter(i => i.name === indexName).length !== 1) {
    throw new Error(`Index ${indexName} does not exist`)
  }

  // Get the Pinecone index
  const index = pinecone!.Index<Metadata>(indexName);

  // Get the namespace
  const pineconeNamespace = index.namespace(namespace ?? '')

  try {
    // Query the index with the defined request
    const queryResult = await pineconeNamespace.query({
      vector: embeddings,
      topK,
      includeMetadata: true,
    })
    return queryResult.matches || []
  } catch (e) {
    // Log the error and throw it
    console.log("Error querying embeddings: ", e)
    throw new Error(`Error querying embeddings: ${e}`)
  }
}
The function takes in embeddings, a topK parameter, and a namespace, and returns the topK matches from the Pinecone index. It first gets a Pinecone client, checks if the desired index exists in the list of indexes, and throws an error if not. Then it gets the specific Pinecone index. The function then queries the Pinecone index with the defined request and returns the matches.
Wrap things up in getContext
We'll wrap things together in the getContext function. This function will take in a message and return the context - either in string form, or as a set of ScoredVector.
export const getContext = async (
  message: string,
  namespace: string,
  maxTokens = 3000,
  minScore = 0.7,
  getOnlyText = true
): Promise<string | ScoredVector[]> => {
  // Get the embeddings of the input message
  const embedding = await getEmbeddings(message);

  // Retrieve the matches for the embeddings from the specified namespace
  const matches = await getMatchesFromEmbeddings(embedding, 3, namespace);

  // Filter out the matches that have a score lower than the minimum score
  const qualifyingDocs = matches.filter((m) => m.score && m.score > minScore);

  // If the `getOnlyText` flag is false, we'll return the matches
  if (!getOnlyText) {
    return qualifyingDocs;
  }

  let docs = matches
    ? qualifyingDocs.map((match) => (match.metadata as Metadata).chunk)
    : [];
  // Join all the chunks of text together, truncate to the maximum number of tokens, and return the result
  return docs.join("\n").substring(0, maxTokens);
};
Back in chat/route.ts, we'll add the call to getContext:
const { messages } = await req.json();

// Get the last message
const lastMessage = messages[messages.length - 1];

// Get the context from the last message
const context = await getContext(lastMessage.content, "");
Update the prompt
Finally, we'll update the prompt to include the context we retrieved from the getContext function.
const prompt = [
  {
    role: "system",
    content: `AI assistant is a brand new, powerful, human-like artificial intelligence.
  The traits of AI include expert knowledge, helpfulness, cleverness, and articulateness.
  AI is a well-behaved and well-mannered individual.
  AI is always friendly, kind, and inspiring, and he is eager to provide vivid and thoughtful responses to the user.
  AI has the sum of all knowledge in their brain, and is able to accurately answer nearly any question about any topic in conversation.
  AI assistant is a big fan of Pinecone and Vercel.
  START CONTEXT BLOCK
  ${context}
  END OF CONTEXT BLOCK
  AI assistant will take into account any CONTEXT BLOCK that is provided in a conversation.
  If the context does not provide the answer to question, the AI assistant will say, "I'm sorry, but I don't know the answer to that question".
  AI assistant will not apologize for previous responses, but instead will indicated new information was gained.
  AI assistant will not invent anything that is not drawn directly from the context.
  `,
  },
];
In this prompt, we added a START CONTEXT BLOCK and END OF CONTEXT BLOCK to indicate where the context should be inserted. We also added a line to indicate that the AI assistant will take into account any context block that is provided in a conversation.
Add the context panel
Next, we need to add the context panel to the chat UI. We'll add a new component called Context (full code).
Add the context endpoint
We want to allow interface to indicate which portions of the retrieved content have been used to generate the response. To do this, we'll add a another endpoint that will call the same getContext.
export async function POST(req: Request) {
  try {
    const { messages } = await req.json();
    const lastMessage =
      messages.length > 1 ? messages[messages.length - 1] : messages[0];
    const context = (await getContext(
      lastMessage.content,
      "",
      10000,
      0.7,
      false
    )) as ScoredPineconeRecord[];
    return NextResponse.json({ context });
  } catch (e) {
    console.log(e);
    return NextResponse.error();
  }
}
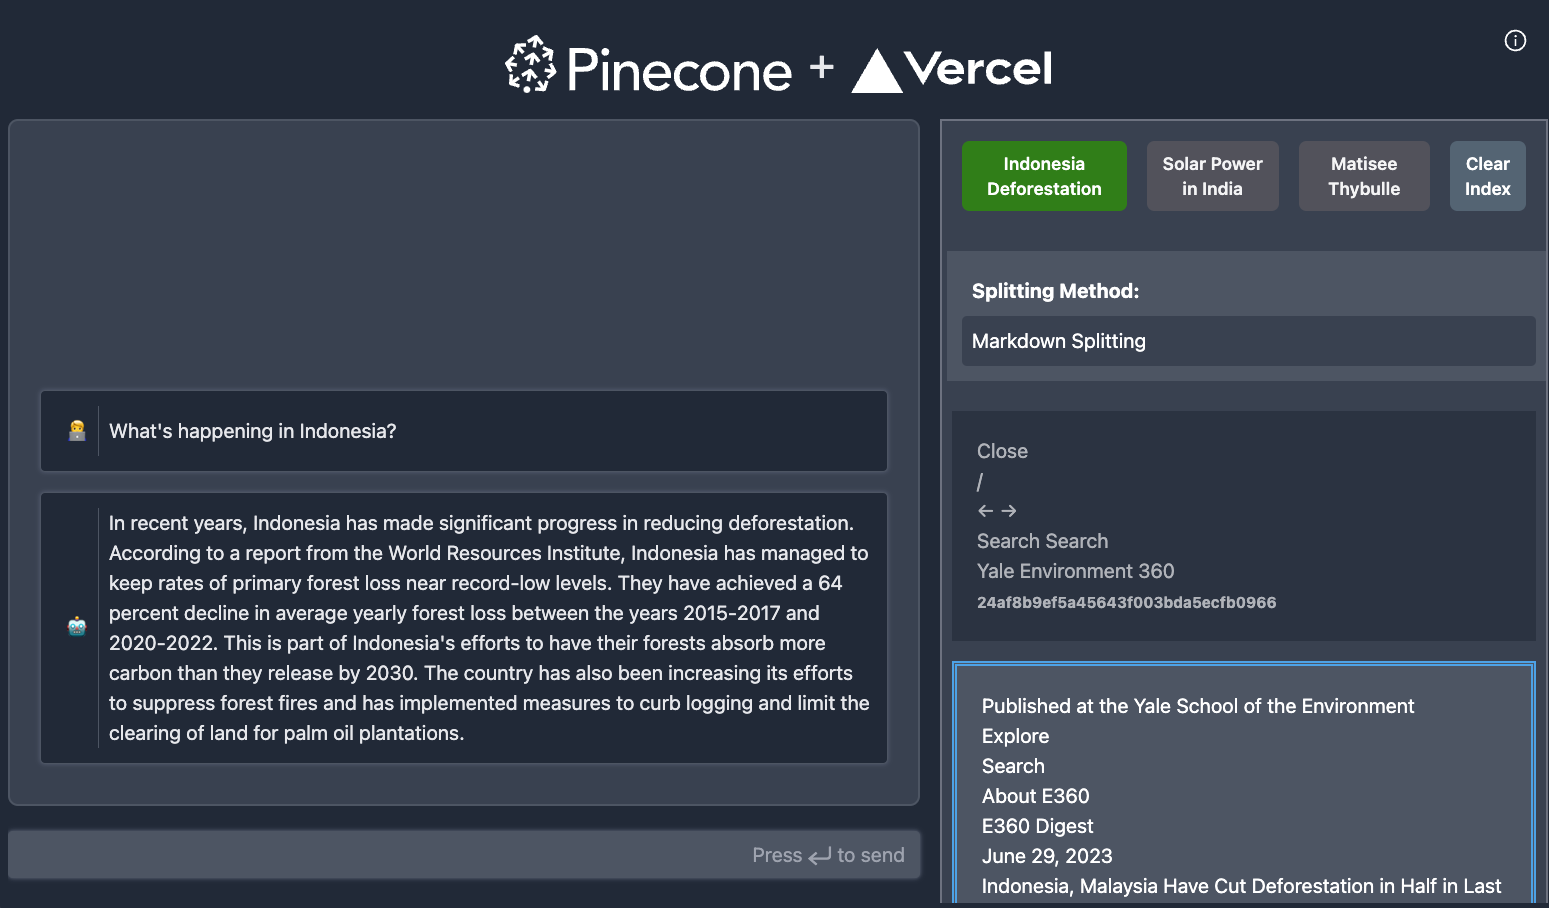
Whenever the user crawls a URL, the context panel will display all the segments of the retrieved webpage. Whenever the backend completes sending a message back, the front end will trigger an effect that will retrieve this context:
useEffect(() => {
  const getContext = async () => {
    const response = await fetch("/api/context", {
      method: "POST",
      body: JSON.stringify({
        messages,
      }),
    });
    const { context } = await response.json();
    setContext(context.map((c: any) => c.id));
  };
  if (gotMessages && messages.length >= prevMessagesLengthRef.current) {
    getContext();
  }

  prevMessagesLengthRef.current = messages.length;
}, [messages, gotMessages]);
Running tests
The pinecone-vercel-starter uses Playwright for end to end testing.
To run all the tests:
npm run test:e2e
By default, when running locally, if errors are encountered, Playwright will open an HTML report showing which tests failed and for which browser drivers.
Displaying test reports locally
To display the latest test report locally, run:
npm run test:show
Pinecone - Vercel AI SDK Starter
A Next.js starter chatbot using Vercel's AI SDK and implements the Retrieval-Augmented Generation (RAG) pattern with Pinecone
In this example, we'll build a full-stack application that uses Retrieval Augmented Generation (RAG) powered by Pinecone to deliver accurate and contextually relevant responses in a chatbot.
RAG is a powerful tool that combines the benefits of retrieval-based models and generative models. Unlike traditional chatbots that can struggle with maintaining up-to-date information or accessing domain-specific knowledge, a RAG-based chatbot uses a knowledge base created from crawled URLs to provide contextually relevant responses.
Incorporating Vercel's AI SDK into our application will allow us easily set up the chatbot workflow and utilize streaming more efficiently, particularly in edge environments, enhancing the responsiveness and performance of our chatbot.
By the end of this tutorial, you'll have a context-aware chatbot that provides accurate responses without hallucination, ensuring a more effective and engaging user experience. Let's get started on building this powerful tool (Full code listing).
Step 1: Setting Up Your Next.js Application
Next.js is a powerful JavaScript framework that enables us to build server-side rendered and static web applications using React. It's a great choice for our project due to its ease of setup, excellent performance, and built-in features such as routing and API routes.
To create a new Next.js app, run the following command:
npx
npx create-next-app chatbot
Next, we'll add the ai package:
npm install ai
You can use the full list of dependencies if you'd like to build along with the tutorial.
Step 2: Create the Chatbot
In this step, we're going to use the Vercel SDK to establish the backend and frontend of our chatbot within the Next.js application. By the end of this step, our basic chatbot will be up and running, ready for us to add context-aware capabilities in the following stages. Let's get started.
Chatbot frontend component
Now, let's focus on the frontend component of our chatbot. We're going to build the user-facing elements of our bot, creating the interface through which users will interact with our application. This will involve crafting the design and functionality of the chat interface within our Next.js application.
First, we'll create the Chat component, that will render the chat interface.
import React, { FormEvent, ChangeEvent } from "react";
import Messages from "./Messages";
import { Message } from "ai/react";

interface Chat {
  input: string;
  handleInputChange: (e: ChangeEvent<HTMLInputElement>) => void;
  handleMessageSubmit: (e: FormEvent<HTMLFormElement>) => Promise<void>;
  messages: Message[];
}

const Chat: React.FC<Chat> = ({
  input,
  handleInputChange,
  handleMessageSubmit,
  messages,
}) => {
  return (
    <div id="chat" className="...">
      <Messages messages={messages} />
      <>
        <form onSubmit={handleMessageSubmit} className="...">
          <input
            type="text"
            className="..."
            value={input}
            onChange={handleInputChange}
          />

          <span className="...">Press ⮐ to send</span>
        </form>
      </>
    </div>
  );
};

export default Chat;
This component will display the list of messages and the input form for the user to send messages. The Messages component to render the chat messages:
import { Message } from "ai"; import { useRef } from "react"; export default function Messages({ messages }: { messages: Message[] }) { const messagesEndRef = useRef<HTMLDivElement | null>(null); return ( <div className="..."> {messages.map((msg, index) => ( <div key={index} className={`${ msg.role === "assistant" ? "text-green-300" : "text-blue-300" } ... `} > <div className="...">{msg.role === "assistant" ? "🤖" : "🧑💻"}</div> <div className="...">{msg.content}</div> </div> ))} <div ref={messagesEndRef} /> </div> ); }
Our main Page component will manage the state for the messages displayed in the Chat component:
"use client";
import Header from "@/components/Header";
import Chat from "@/components/Chat";
import { useChat } from "ai/react";

const Page: React.FC = () => {
  const [context, setContext] = useState<string[] | null>(null);
  const { messages, input, handleInputChange, handleSubmit } = useChat();

  return (
    <div className="...">
      <Header className="..." />
      <div className="...">
        <Chat
          input={input}
          handleInputChange={handleInputChange}
          handleMessageSubmit={handleSubmit}
          messages={messages}
        />
      </div>
    </div>
  );
};

export default Page;
The useful useChat hook will manage the state for the messages displayed in the Chat component. It will:
- Send the user's message to the backend
- Update the state with the response from the backend
- Handle any internal state changes (e.g. when the user types a message)
Chatbot API endpoint
Next, we'll set up the Chatbot API endpoint. This is the server-side component that will handle requests and responses for our chatbot. We'll create a new file called api/chat/route.ts and add the following dependencies:
import { Configuration, OpenAIApi } from "openai-edge";
import { Message, OpenAIStream, StreamingTextResponse } from "ai";
The first dependency is the openai-edge package which makes it easier to interact with OpenAI's APIs in an edge environment. The second dependency is the ai package which we'll use to define the Message and OpenAIStream types, which we'll use to stream back the response from OpenAI back to the client.
Next initialize the OpenAI client:
// Create an OpenAI API client (that's edge friendly!)
const config = new Configuration({
  apiKey: process.env.OPENAI_API_KEY,
});
const openai = new OpenAIApi(config);
To define this endpoint as an edge function, we'll define and export the runtime variable
export const runtime = "edge";
Next, we'll define the endpoint handler:
export async function POST(req: Request) {
  try {
    const { messages } = await req.json();

    const prompt = [
      {
        role: "system",
        content: `AI assistant is a brand new, powerful, human-like artificial intelligence.
      The traits of AI include expert knowledge, helpfulness, cleverness, and articulateness.
      AI is a well-behaved and well-mannered individual.
      AI is always friendly, kind, and inspiring, and he is eager to provide vivid and thoughtful responses to the user.
      AI has the sum of all knowledge in their brain, and is able to accurately answer nearly any question about any topic in conversation.
      AI assistant is a big fan of Pinecone and Vercel.
      `,
      },
    ];

    // Ask OpenAI for a streaming chat completion given the prompt
    const response = await openai.createChatCompletion({
      model: "gpt-3.5-turbo",
      stream: true,
      messages: [
        ...prompt,
        ...messages.filter((message: Message) => message.role === "user"),
      ],
    });
    // Convert the response into a friendly text-stream
    const stream = OpenAIStream(response);
    // Respond with the stream
    return new StreamingTextResponse(stream);
  } catch (e) {
    throw e;
  }
}
Here we deconstruct the messages from the post, and create our initial prompt. We use the prompt and the messages as the input to the createChatCompletion method. We then convert the response into a stream and return it to the client. Note that in this example, we only send the user's messages to OpenAI (as opposed to including the bot's messages as well).
Step 3. Adding Context
As we dive into building our chatbot, it's important to understand the role of context. Adding context to our chatbot's responses is key for creating a more natural, conversational user experience. Without context, a chatbot's responses can feel disjointed or irrelevant. By understanding the context of a user's query, our chatbot will be able to provide more accurate, relevant, and engaging responses. Now, let's begin building with this goal in mind.
First, we'll first focus on seeding the knowledge base. We'll create a crawler and a seed script, and set up a crawl endpoint. This will allow us to gather and organize the information our chatbot will use to provide contextually relevant responses.
After we've populated our knowledge base, we'll retrieve matches from our embeddings. This will enable our chatbot to find relevant information based on user queries.
Next, we'll wrap our logic into the getContext function and update our chatbot's prompt. This will streamline our code and improve the user experience by ensuring the chatbot's prompts are relevant and engaging.
Finally, we'll add a context panel and an associated context endpoint. These will provide a user interface for the chatbot and a way for it to retrieve the necessary context for each user query.
This step is all about feeding our chatbot the information it needs and setting up the necessary infrastructure for it to retrieve and use that information effectively. Let's get started.
Seeding the Knowledge Base
Now we'll move on to seeding the knowledge base, the foundational data source that will inform our chatbot's responses. This step involves collecting and organizing the information our chatbot needs to operate effectively. In this guide, we're going to use data retrieved from various websites which we'll later on be able to ask questions about. To do this, we'll create a crawler that will scrape the data from the websites, embed it, and store it in Pinecone.
Create the crawler
For the sake of brevity, you'll be able to find the full code for the crawler here. Here are the pertinent parts:
class Crawler {
  private seen = new Set<string>();
  private pages: Page[] = [];
  private queue: { url: string; depth: number }[] = [];

  constructor(private maxDepth = 2, private maxPages = 1) {}

  async crawl(startUrl: string): Promise<Page[]> {
    // Add the start URL to the queue
    this.addToQueue(startUrl);

    // While there are URLs in the queue and we haven't reached the maximum number of pages...
    while (this.shouldContinueCrawling()) {
      // Dequeue the next URL and depth
      const { url, depth } = this.queue.shift()!;

      // If the depth is too great or we've already seen this URL, skip it
      if (this.isTooDeep(depth) || this.isAlreadySeen(url)) continue;

      // Add the URL to the set of seen URLs
      this.seen.add(url);

      // Fetch the page HTML
      const html = await this.fetchPage(url);

      // Parse the HTML and add the page to the list of crawled pages
      this.pages.push({ url, content: this.parseHtml(html) });

      // Extract new URLs from the page HTML and add them to the queue
      this.addNewUrlsToQueue(this.extractUrls(html, url), depth);
    }

    // Return the list of crawled pages
    return this.pages;
  }

  // ... Some private methods removed for brevity

  private async fetchPage(url: string): Promise<string> {
    try {
      const response = await fetch(url);
      return await response.text();
    } catch (error) {
      console.error(`Failed to fetch ${url}: ${error}`);
      return "";
    }
  }

  private parseHtml(html: string): string {
    const $ = cheerio.load(html);
    $("a").removeAttr("href");
    return NodeHtmlMarkdown.translate($.html());
  }

  private extractUrls(html: string, baseUrl: string): string[] {
    const $ = cheerio.load(html);
    const relativeUrls = $("a")
      .map((_, link) => $(link).attr("href"))
      .get() as string[];
    return relativeUrls.map(
      (relativeUrl) => new URL(relativeUrl, baseUrl).href
    );
  }
}
The Crawler class is a web crawler that visits URLs, starting from a given point, and collects information from them. It operates within a certain depth and a maximum number of pages as defined in the constructor. The crawl method is the core function that starts the crawling process.
The helper methods fetchPage, parseHtml, and extractUrls respectively handle fetching the HTML content of a page, parsing the HTML to extract text, and extracting all URLs from a page to be queued for the next crawl. The class also maintains a record of visited URLs to avoid duplication.
Create the seed function
To tie things together, we'll create a seed function that will use the crawler to seed the knowledge base. In this portion of the code, we'll initialize the crawl and fetch a given URL, then split it's content into chunks, and finally embed and index the chunks in Pinecone.
async function seed(url: string, limit: number, indexName: string, options: SeedOptions) {
  try {
    // Initialize the Pinecone client
    const pinecone = new Pinecone();

    // Destructure the options object
    const { splittingMethod, chunkSize, chunkOverlap } = options;

    // Create a new Crawler with depth 1 and maximum pages as limit
    const crawler = new Crawler(1, limit || 100);

    // Crawl the given URL and get the pages
    const pages = await crawler.crawl(url) as Page[];

    // Choose the appropriate document splitter based on the splitting method
    const splitter: DocumentSplitter = splittingMethod === 'recursive' ?
      new RecursiveCharacterTextSplitter({ chunkSize, chunkOverlap }) : new MarkdownTextSplitter({});

    // Prepare documents by splitting the pages
    const documents = await Promise.all(pages.map(page => prepareDocument(page, splitter)));

    // Create Pinecone index if it does not exist
    const indexList = await pinecone.listIndexes();
    const indexExists = indexList.some(index => index.name === indexName)
    if (!indexExists) {
      await pinecone.createIndex({
        name: indexName,
        dimension: 1536,
        waitUntilReady: true,
      });
    }

    const index = pinecone.Index(indexName)

    // Get the vector embeddings for the documents
    const vectors = await Promise.all(documents.flat().map(embedDocument));

    // Upsert vectors into the Pinecone index
    await chunkedUpsert(index!, vectors, '', 10);

    // Return the first document
    return documents[0];
  } catch (error) {
    console.error("Error seeding:", error);
    throw error;
  }
}
To chunk the content we'll use one of the following methods:
RecursiveCharacterTextSplitter- This splitter splits the text into chunks of a given size, and then recursively splits the chunks into smaller chunks until the chunk size is reached. This method is useful for long documents.MarkdownTextSplitter- This splitter splits the text into chunks based on Markdown headers. This method is useful for documents that are already structured using Markdown. The benefit of this method is that it will split the document into chunks based on the headers, which will be useful for our chatbot to understand the structure of the document. We can assume that each unit of text under a header is an internally coherent unit of information, and when the user asks a question, the retrieved context will be internally coherent as well.
Add the crawl endpoint`
The endpoint for the crawl endpoint is pretty straightforward. It simply calls the seed function and returns the result.
import seed from "./seed";
import { NextResponse } from "next/server";

export const runtime = "edge";

export async function POST(req: Request) {
  const { url, options } = await req.json();
  try {
    const documents = await seed(url, 1, process.env.PINECONE_INDEX!, options);
    return NextResponse.json({ success: true, documents });
  } catch (error) {
    return NextResponse.json({ success: false, error: "Failed crawling" });
  }
}
Now our backend is able to crawl a given URL, embed the content and index the embeddings in Pinecone. The endpoint will return all the segments in the retrieved webpage we crawl, so we'll be able to display them. Next, we'll write a set of functions that will build the context out of these embeddings.
Get matches from embeddings
To retrieve the most relevant documents from the index, we'll use the query function in the Pinecone SDK. This function takes a vector and returns the most similar vectors from the index. We'll use this function to retrieve the most relevant documents from the index, given some embeddings.
const getMatchesFromEmbeddings = async (embeddings: number[], topK: number, namespace: string): Promise<ScoredPineconeRecord<Metadata>[]> => {
  // Obtain a client for Pinecone
  const pinecone = new Pinecone();

  const indexName: string = process.env.PINECONE_INDEX || '';
  if (indexName === '') {
    throw new Error('PINECONE_INDEX environment variable not set')
  }

  // Retrieve the list of indexes to check if expected index exists
  const indexes = await pinecone.listIndexes()
  if (indexes.filter(i => i.name === indexName).length !== 1) {
    throw new Error(`Index ${indexName} does not exist`)
  }

  // Get the Pinecone index
  const index = pinecone!.Index<Metadata>(indexName);

  // Get the namespace
  const pineconeNamespace = index.namespace(namespace ?? '')

  try {
    // Query the index with the defined request
    const queryResult = await pineconeNamespace.query({
      vector: embeddings,
      topK,
      includeMetadata: true,
    })
    return queryResult.matches || []
  } catch (e) {
    // Log the error and throw it
    console.log("Error querying embeddings: ", e)
    throw new Error(`Error querying embeddings: ${e}`)
  }
}
The function takes in embeddings, a topK parameter, and a namespace, and returns the topK matches from the Pinecone index. It first gets a Pinecone client, checks if the desired index exists in the list of indexes, and throws an error if not. Then it gets the specific Pinecone index. The function then queries the Pinecone index with the defined request and returns the matches.
Wrap things up in getContext
We'll wrap things together in the getContext function. This function will take in a message and return the context - either in string form, or as a set of ScoredVector.
export const getContext = async (
  message: string,
  namespace: string,
  maxTokens = 3000,
  minScore = 0.7,
  getOnlyText = true
): Promise<string | ScoredVector[]> => {
  // Get the embeddings of the input message
  const embedding = await getEmbeddings(message);

  // Retrieve the matches for the embeddings from the specified namespace
  const matches = await getMatchesFromEmbeddings(embedding, 3, namespace);

  // Filter out the matches that have a score lower than the minimum score
  const qualifyingDocs = matches.filter((m) => m.score && m.score > minScore);

  // If the `getOnlyText` flag is false, we'll return the matches
  if (!getOnlyText) {
    return qualifyingDocs;
  }

  let docs = matches
    ? qualifyingDocs.map((match) => (match.metadata as Metadata).chunk)
    : [];
  // Join all the chunks of text together, truncate to the maximum number of tokens, and return the result
  return docs.join("\n").substring(0, maxTokens);
};
Back in chat/route.ts, we'll add the call to getContext:
const { messages } = await req.json();

// Get the last message
const lastMessage = messages[messages.length - 1];

// Get the context from the last message
const context = await getContext(lastMessage.content, "");
Update the prompt
Finally, we'll update the prompt to include the context we retrieved from the getContext function.
const prompt = [
  {
    role: "system",
    content: `AI assistant is a brand new, powerful, human-like artificial intelligence.
  The traits of AI include expert knowledge, helpfulness, cleverness, and articulateness.
  AI is a well-behaved and well-mannered individual.
  AI is always friendly, kind, and inspiring, and he is eager to provide vivid and thoughtful responses to the user.
  AI has the sum of all knowledge in their brain, and is able to accurately answer nearly any question about any topic in conversation.
  AI assistant is a big fan of Pinecone and Vercel.
  START CONTEXT BLOCK
  ${context}
  END OF CONTEXT BLOCK
  AI assistant will take into account any CONTEXT BLOCK that is provided in a conversation.
  If the context does not provide the answer to question, the AI assistant will say, "I'm sorry, but I don't know the answer to that question".
  AI assistant will not apologize for previous responses, but instead will indicated new information was gained.
  AI assistant will not invent anything that is not drawn directly from the context.
  `,
  },
];
In this prompt, we added a START CONTEXT BLOCK and END OF CONTEXT BLOCK to indicate where the context should be inserted. We also added a line to indicate that the AI assistant will take into account any context block that is provided in a conversation.
Add the context panel
Next, we need to add the context panel to the chat UI. We'll add a new component called Context (full code).
Add the context endpoint
We want to allow interface to indicate which portions of the retrieved content have been used to generate the response. To do this, we'll add a another endpoint that will call the same getContext.
export async function POST(req: Request) {
  try {
    const { messages } = await req.json();
    const lastMessage =
      messages.length > 1 ? messages[messages.length - 1] : messages[0];
    const context = (await getContext(
      lastMessage.content,
      "",
      10000,
      0.7,
      false
    )) as ScoredPineconeRecord[];
    return NextResponse.json({ context });
  } catch (e) {
    console.log(e);
    return NextResponse.error();
  }
}
Whenever the user crawls a URL, the context panel will display all the segments of the retrieved webpage. Whenever the backend completes sending a message back, the front end will trigger an effect that will retrieve this context:
useEffect(() => {
  const getContext = async () => {
    const response = await fetch("/api/context", {
      method: "POST",
      body: JSON.stringify({
        messages,
      }),
    });
    const { context } = await response.json();
    setContext(context.map((c: any) => c.id));
  };
  if (gotMessages && messages.length >= prevMessagesLengthRef.current) {
    getContext();
  }

  prevMessagesLengthRef.current = messages.length;
}, [messages, gotMessages]);
Running tests
The pinecone-vercel-starter uses Playwright for end to end testing.
To run all the tests:
npm run test:e2e
By default, when running locally, if errors are encountered, Playwright will open an HTML report showing which tests failed and for which browser drivers.
Displaying test reports locally
To display the latest test report locally, run:
npm run test:show
%20pattern%20with%20Pinecone&demo-image=%2F%2Fimages.ctfassets.net%2Fe5382hct74si%2F1G4xSqx0bCgVVv3aY3rrX4%2Ffa27791c39ddf058995561d794a68710%2FCleanShot_2023-07-21_at_11.55.49.png&demo-title=Pinecone%20-%20Vercel%20AI%20SDK%20Starter&demo-url=https%3A%2F%2Fpinecone-vercel-example.vercel.app%2F&env=OPENAI_API_KEY%2CPINECONE_API_KEY%2CPINECONE_ENVIRONMENT%2CPINECONE_INDEX&envDescription=How%20to%20get%20these%20env%20vars%3A&envLink=https%3A%2F%2Fgithub.com%2Fpinecone-io%2Fpinecone-vercel-starter%2Fblob%2Fmain%2F.env.example&from=templates&project-name=Pinecone%20-%20Vercel%20AI%20SDK%20Starter&repository-name=pinecone-vercel-ai&repository-url=https%3A%2F%2Fgithub.com%2Fpinecone-io%2Fpinecone-vercel-starter&skippable-integrations=1)